.

HOME .......... ABOUT .......... WINKLE ARTS .......... PUNCH NEEDLE TIPS ........... FINISHED PUNCH NEEDLE ......... MINI PUNCH NEEDLE ...... HOW TO PURCHASE ...... ARCHIVE......MAIN SHOP ...... ETSY SHOP ...... FACEBOOK...... PINTEREST ...... INSTAGRAM

Friday, July 27, 2018

2nd batch of finished needle punch


Moonlite Iris
Available

Harvest gold
Available

B is for bunny
Available

Chrysanthe mums 
Available

Simple floral
Available


I have decided I’m going to start selling the models for my punch needle patterns. Keep in mind I only punch one model for pattern photo, design and color placement.
So keep in mind when they are sold. That’s it!

Follow me on Etsy at:


Or Facebook for new available:


Kate

Finished punch needle models


Mystical Melinda
Available


Christmas past
Sold


Shamrock
Sold


A New Hat
Sold


Teensy Towne
Available

I have decided I’m going to start selling the models for my punch needle patterns. Keep in mind I only punch one model for pattern photo, design and color placement.
So keep in mind when they are sold. That’s it!

Follow me on Etsy at:


Or Facebook for new available:

Monday, June 25, 2018

The Orchard collection finishes


Suggested finishes for the Orchard Collection:


Table Runner

Table center piece and single placemat decorations.


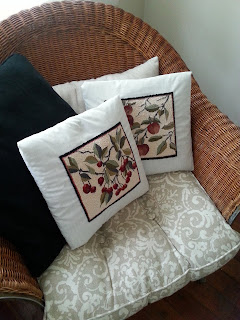
Pillows


Coasters


Citrus collection


The Banner


How to make a banner.


What you will need:
 (all available at you home improvement store)
Firing strip 1 1/2" x 3/4" x length needed?
2 part epoxy
Command strips for hanging heavy frames
measuring tape
screw driver
hammer
office stapler
2 part magnets (I used nine, available in my Etsy shop)
wool backing
finished punches


close up of Epoxy and command strips.


Lay your finished pieces together so you can measure the amount of wool needed for the backing of the banner. Cut your wool to appropriate size. Sew your finished punches to the wool backing using a whip stitch. Since the edge of the punches are punched with a black border. I was able to use a sharpie marker to cover any white weavers cloth that was showing on the edge. This gives it a completed look. I then added the magnets every seven inches to keep the banner straight when mounted. My magnets available in the shop are able to be stitched at the four corners.


1). Lay your finished punch banner on a flat surface. 
2). Measure & cut your firing strip to the length needed. 

To achieve the appropriate placement of the magnets.  
3). Place the finished punch banner on top of the cut firing strip. 
4). Add the second part of the magnet to the finished punch needle banner. 
You will see that the magnets have  a little nib on the wrong side. 
5). Press with your fingers on the top of the punch where the magnet is. 
It will leave a little indent in the wood where the nib is. 
This assures that the magnet is in the proper place.
6). Using a screw driver and hammer, punch a indent in the wood only for the nib. 
check to make sure the magnet is flush with the wood.
7). Using your epoxy glue, mix according to direction. 
8). Add the glue to the nib side of the magnet. 
Press so that the magnet is flush with the wood. 
Repeat for all the magnets across the firing strip.


Add one side of the Command strips to the back of the firing strip.
 Use a common office stapler punch three staples into the command strip for added security.


Place the 2nd side of the command strip onto the 1st side of the command strip attached to the wood.
Peel the glue protector and place where would like it on the wall.
press firmly. gently remove the firing strip. this will place the wall side of the firing strip in the appropriate area on the wall. Wait the allotted amount of time for the glue to adhere. 

Press your firing strip to the command strips on the wall. 
Your board is now mounted and ready for your banner.

If you have any questions please comment below. I will try and answer quickly.

Enjoy Kate.


Monday, January 8, 2018

Finish Winter White


Winter White is backed with felted wool..
This is not died just machine washed and dried for felting.
A lovely wool that I thought would be perfect for this cute little snowman...keeping it simple and neutral. I chose to rim the edge in small pearls, again neutral as not to detract from the punch needle simplicity. Hoping this afternoon I will finish him up. 
PS. notice I am using a beading needle which is very long and skinny, makes beading simpler but threading the little bugger can be a challenge with these aged eyes. 
Stay warm and enjoy, Kate

Tuesday, January 24, 2017

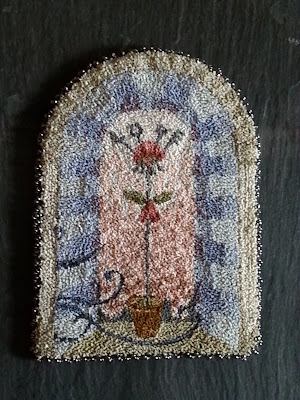
Love Grows

Finished Punch For sale


"Love Grows"
#PN 220

Hand Sewn,
Punch Needle Model for my designers pattern.
Although the Pattern is available, I only Punch and finish one of each pattern.
This punch is worked using DMC only.
Hand sewn wool backing, Hand beaded on the outer edge to finish.

Signed by the Designer/Artist......Kate Gillery
Finished measurements: 6 3/4" High x 5" Wide x 1/4" Deep

Very intricate punch.
A wonderful gift or addition to your collection.

AVAILABLE
$70.00 + shipping

If you are interested in this finished punch. I would be glad to included it as a personal listing, Reserved for you in my Cottage Etsy shop. Please send an Email to me at : kgillery@gmail.com, include the name and number of the Punch.

Happy Valentines Day,
Kate

Tuesday, November 22, 2016

Fall Floral cloth basket


"Fall floral, cloth basket"

Hand sewn, Hard heavy weight paper on the inside to keep the basket shape, and the sides upright . 
Punch needle model for my designers pattern. 
Although the Pattern is available, I only Punch & finish one each of my patterns.
This punch is worked using Valdani Perle Cotton & DMC floss.
Hand sewn onto Linen, lined with quilters cotton on the inside.

Signed by the Designer/Artist......Kate Gillery
Finished it measures: 9 1/2" High x 10" Wide by 8" Deep
Punch Needle Measures: 7 3/4 " High by 5 " Wide

A wonderful addition to your collection.

AVAILABLE
$95.00 + shipping

Now available in my Etsy shop:


Happy Holidays,
Kate